
Getting Started
Motor Sound Editor is built for creators who want to design layered motor sound projects in a visual editor instead of hand-maintaining raw simulator tables. The current version is focused on three core workflows already implemented in the desktop app: project authoring, real-time preview, and export packaging.
1. Preparation
Operating system
Windows is the primary supported platform today.
Download and install
- Get the app: Download the current Windows installer directly from this release link.
- Quick install: After downloading, run the installer. No extra runtime setup is required because the Tauri dependencies are already bundled with the app.
Example files
If you want working .msep projects to inspect right away, start with these examples:
- caf_train_sound.msep — Contributor: K.L1
- class323.msep — Contributor: LX9702
Data and assets
- Assets: Prepare at least one motor sound source file in
.wavor.ogg. - Parameters: Prepare the train's basic performance values, such as maximum speed, acceleration, and brake deceleration.
2. Core workflow
You can experience the main features of the app through these six steps:
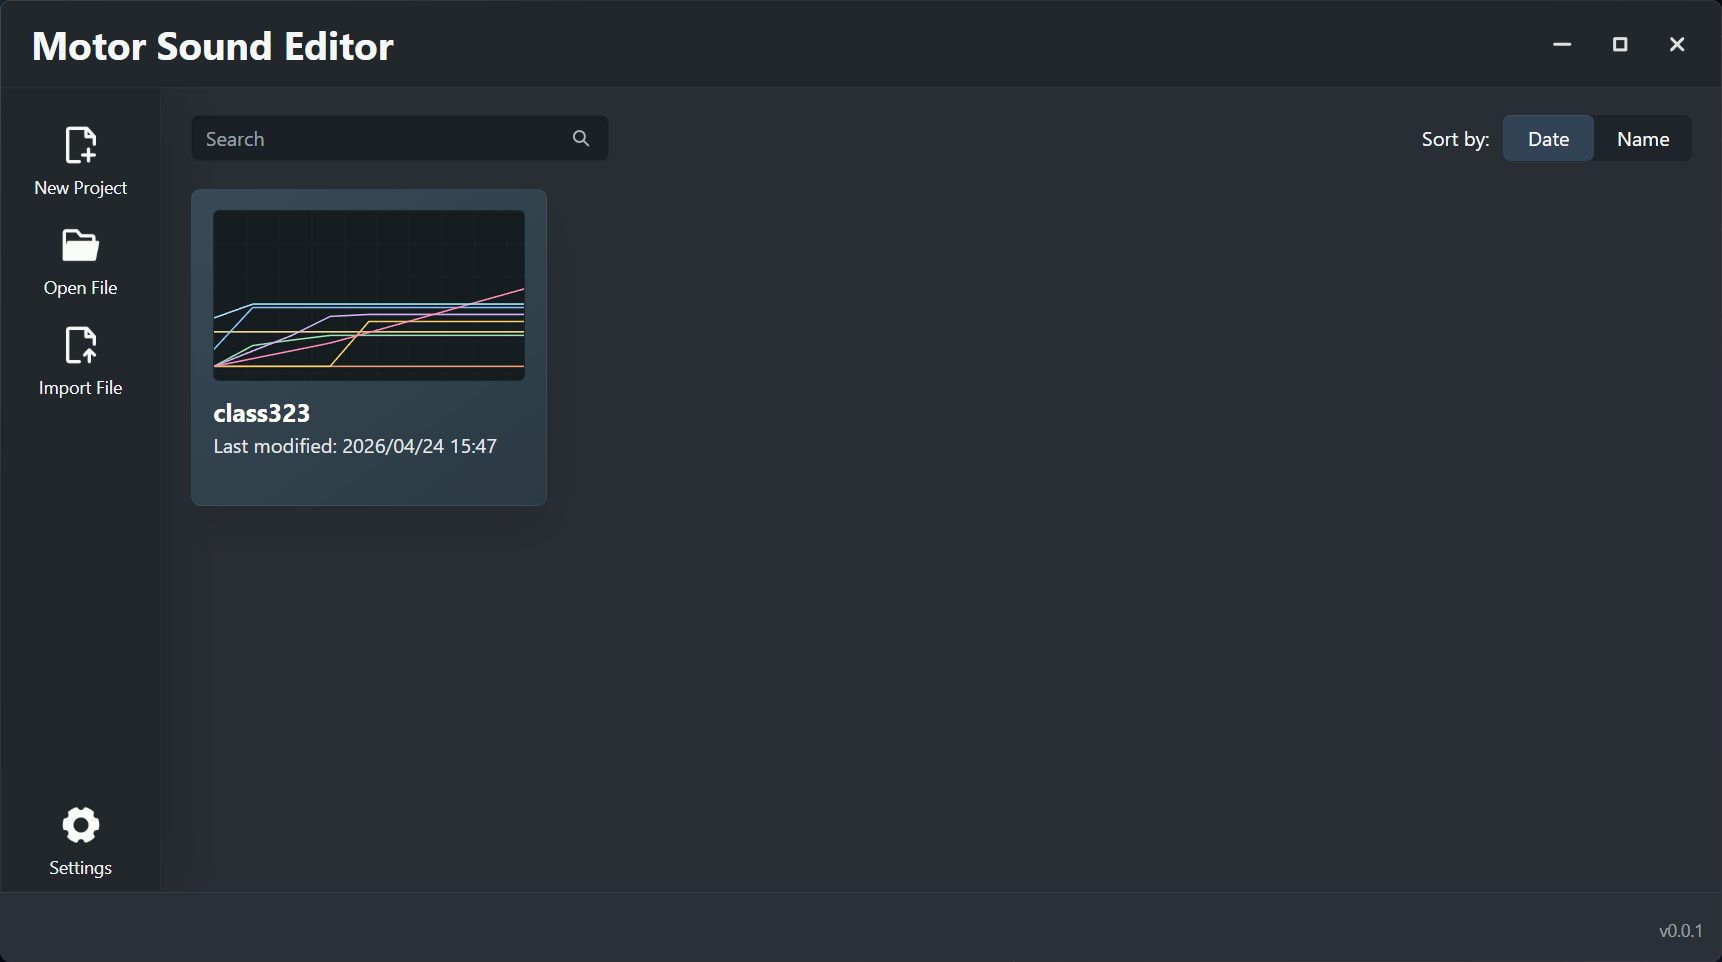
Step 1: Create a project
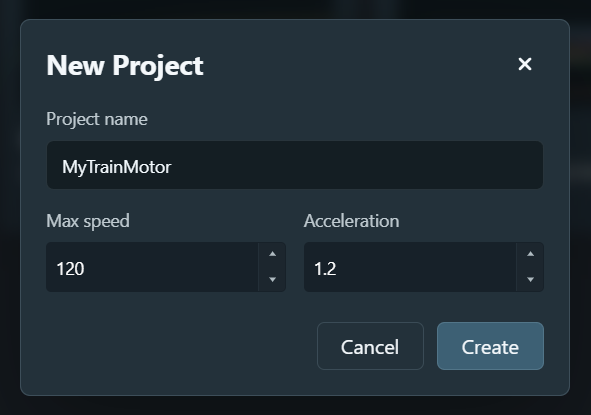
- Launch the app and click New Project on the Home screen.
- Enter a project name such as
MyTrainMotor. - Set defaults such as Max Speed and Acceleration.
- Confirm and enter the editor.
Step 2: Manage tracks and import audio
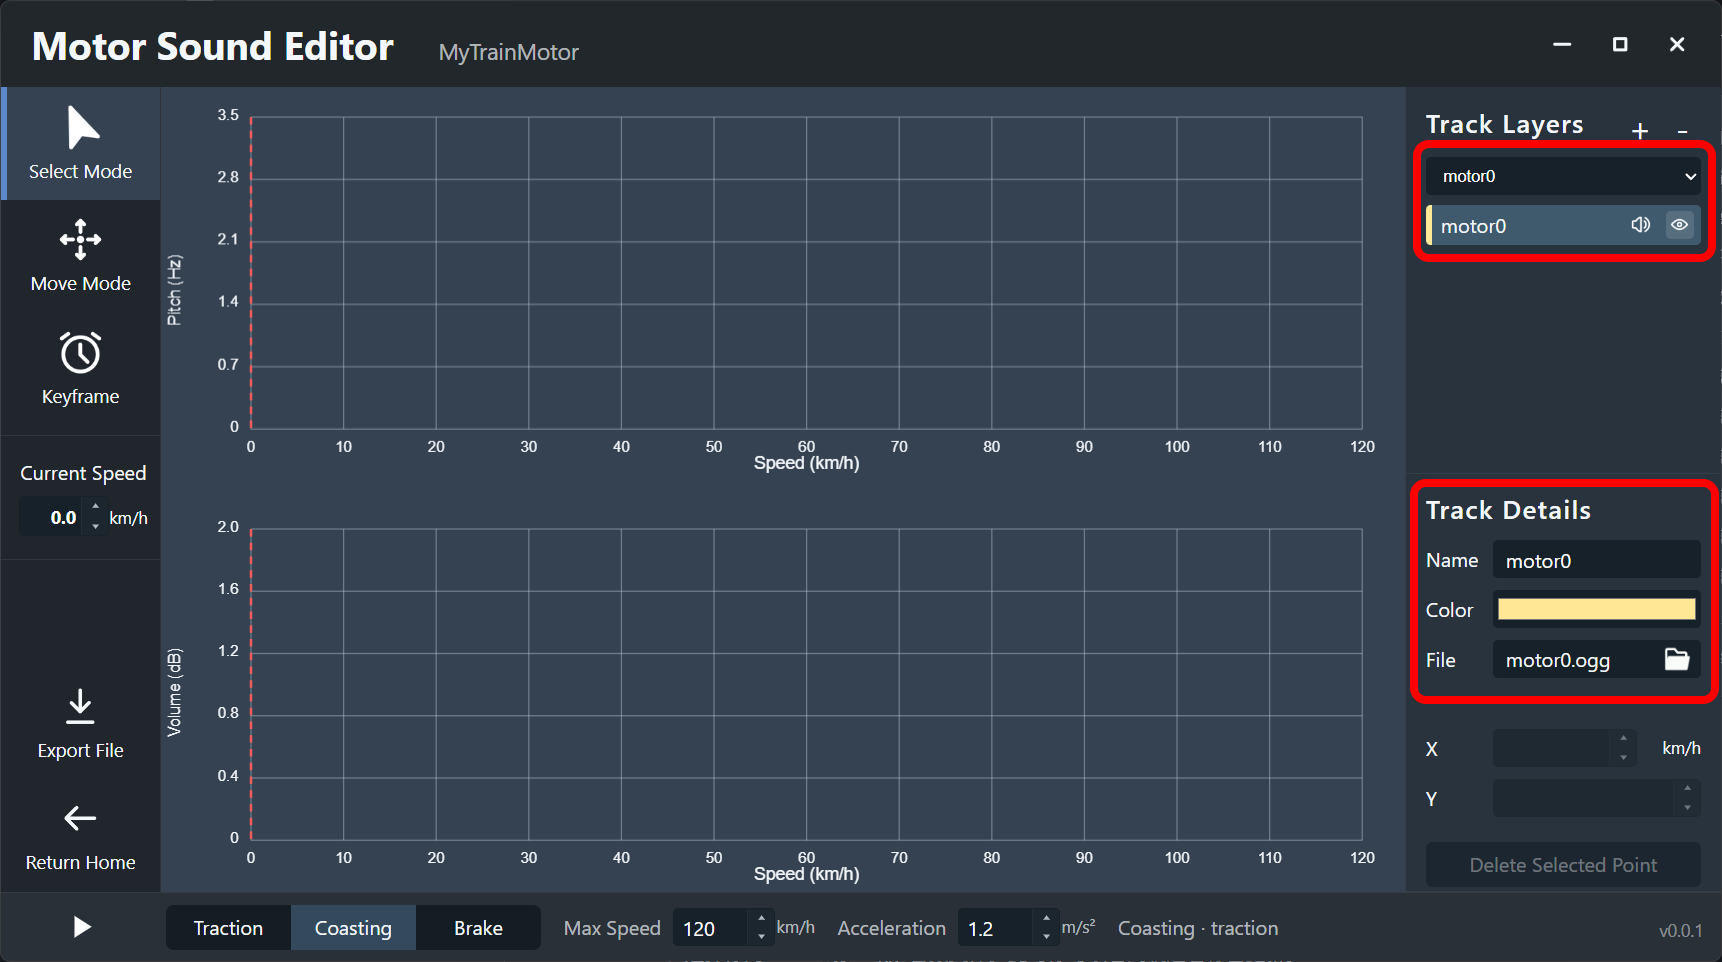
- In Track Layers, make sure there is an active track.
- In Track Details, click the file picker icon.
- Choose a
.wavor.oggaudio file.
Step 3: Draw pitch and volume curves
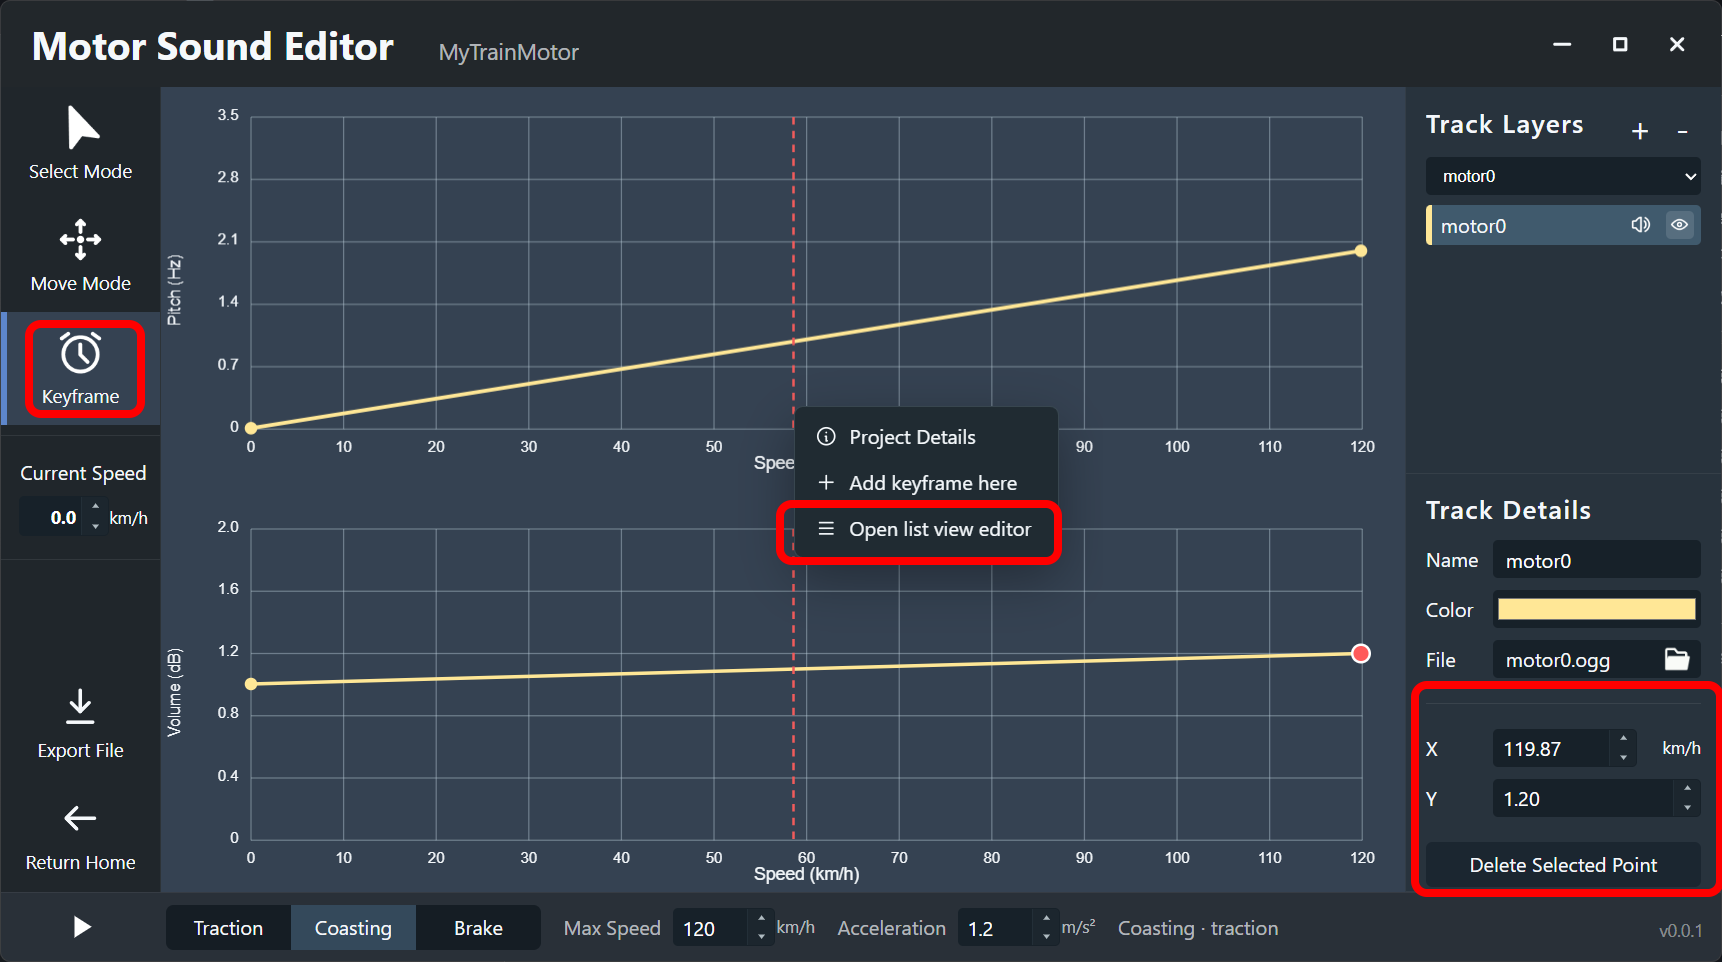
- Switch to Keyframe mode in the toolbar.
- Add keyframes for Traction Pitch and Traction Volume in the chart. Left click adds a point and right click removes one.
- For finer control, switch to Move mode to drag keyframes or edit values directly in List Editor.
Step 4: Preview in real time

- Press
Spaceto start playback. - Use
Wto move the state toward traction andSto move it toward brake. - Adjust Current Speed, or switch to Select mode and click empty space in the chart to change preview speed quickly.
Step 5: Save the project
- Press
Ctrl+Sto save the project as.msep. .msepis the app's native project format. It packages project settings, curve data, and audio assets together so the project stays portable and editable.
Step 6: Export a BVE package
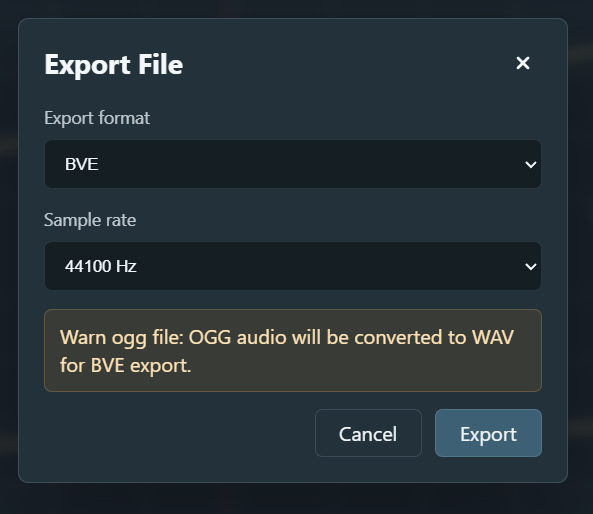
- Click Export in the toolbar or menu.
- Choose BVE in the dialog.
- Select a sample rate, usually
44100 Hz. - The app generates a
.zippackage containing the required BVE files such asvehicle.txt,motornoise.txt, and converted WAV audio.
3. Common shortcuts
A small set of shortcuts already covers most of the daily editing loop:
| Shortcut | Action |
|---|---|
| Space | Play / pause preview |
| W | Move the state toward traction |
| S | Move the state toward brake |
| Ctrl+S | Save the project |
| Ctrl+Z / Ctrl+Y | Undo / redo |
| Delete | Delete the selected keyframe |